[ home ]
[ updates ]
[ articles ]
[ media ]
[ notebook ]
[ gallery ]
[ links ]
[ help ]
[ contact ]
|
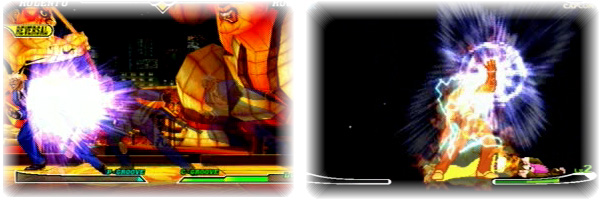
 CvS2 Reversal Combo Exhibition - 02.23.2004 CvS2 Reversal Combo Exhibition - 02.23.2004
performed and edited by Maj (2:37, 22,017 KB, MPG)
CvS2 Reversal Combo Exhibition Guide
Game Versions: Capcom vs SNK / Dreamcast / Japan / 2000
Game Versions: Capcom vs SNK Pro / Dreamcast / Japan / 2001
Game Versions: Capcom vs SNK 2 / Dreamcast / Japan / 2001
Soundtrack: Cursive - Art Is Hard
The basic theme of this video centers around two player combos - specifically, on setups creating scenarios where the combo is performed by executing a Reversal. Naturally, none of this is usable in competitive play, but some of it sheds light on game engine aspects that competitive play typically never explores. As usual, all combos were performed on standard Dreamcast pads. Any extensive opponent action required during the making of these clips was performed by family and friends credited at the end of the video. On certain CvS2 stages, the game was briefly paused before the combo to eliminate background sound effects, such as the droning helicopter and bus noises, without affecting impact sound effects or character voices. The video as a whole simply turned out shaper and smoother without random noise clashing against the soundtrack. Other noteworthy details include the usage of every major CvS2 stage variation, the application of all arcade selectable grooves, the selection of exclusive CvS and CvSPro character colors unavailable in CvS2, and the compilation of all eight standard CvS2 Rolento colors. In fact, the video properly demonstrates Rolento's unique versatility as a combo dummy beyond the obvious usefulness of his Steel Rain attack.
Haohmaru vs M.Bison combo
Since neither Haohmaru's fireball nor his LP uppercut have any juggle potential and since both cause knockdown, they can only combo together if they connect simultaneously. Restricting the uppercut timing to require a Reversal only complicates matters. Incidentally, the use of A-Groove Custom Combo mode is not essential to this combo. However, without the instantaneous charge CC mode offers, Bison has to switch charge directions mid-air just as he passes Haohmaru's center. Does this overly complicated combo really need a third one-frame execution window?
Guile vs Ken combo
The entire concept of juggling with Custom Combo mode projectiles following CC deactivation was introduced to me by T7. Projectiles performed during A-Groove Custom Combo mode retain CC juggle properties even after the CC ends. In this clip, Ken throws Guile out of a CC mode Sonic Boom, forcing a side switch on the frame the Sonic Boom is created. Consequently, it travels in the opposite direction and sets up the combo.
Kyosuke vs Rolento combo
Here, as with most instances in CvS2, a Reversal is not technically necessary for the bonus juggle. Any attack will juggle the opponent following a Steel Rain interrupt of Kyosuke's Lightning Upper as it is canceled into his Shadow Cut Kick. However, even with the hit stun reduction gained by using the CC version of Steel Rain, this particular combo never works without Reversal timing due only to the prohibitively long startup of Kyosuke's Lightning Uppers.
Morrigan vs Rock combo
The basic principle behind this combo is that lvl2 supers become cancelable as soon as a non-throw super hit connects, even if that hit doesn't come from the lvl2 super itself. In this instance, Morrigan's lvl2 Valkyrie Turn (HCB + K) becomes cancelable as soon as her lvl1 super fireball connects. Rock's fireball interrupt and Morrigan's Reversal are only necessary due to the lengthy recovery period of the lvl1 super fireball. Without Rock's assistance, he would hit the floor before Morrigan's HP air fireball was able to reach him. The Valkyrie Turn disables horizontal stage scrolling upon initiation, thereby suspending screen movement until the move ends. Apparently, this property can be inherited by a special move used to cancel the lvl2 Valkyrie Turn. Hence, it is possible to perform this combo midscreen as shown. Oddly enough, the lvl2 Valkyrie Turn can be canceled even while Morrigan is off the screen - she simply reappears at the edge of the screen.
Yuri vs Rolento combo
It turns out that the third hit of Yuri's HP double uppercut has a juggle potential of three. Therefore, it can juggle after Yuri's two-hit lvl1 super fireball and her three-hit lvl2 super fireball, but not following her five-hit lvl3 super fireball. Although it's slightly more difficult to get this combo to work using her lvl2 super fireball instead, it's rather pointless since she can simply cancel the lvl2 super fireball into the uppercut, landing every hit. It also requires Rolento's CC mode Steel Rain (QCF, QCF + K) in place of his Stinger (DP + K, P/K), which is somewhat less elegant. Therefore, her lvl1 super fireball is used. Also, in case it's not noticeable, Rolento jumps straight up as soon as he finishes the Stinger animation to delay his landing once Yuri's super fireball connects.
Terry vs Athena combo
Athena's LK Phoenix Arrow (QCB + K in air) serves the dual purpose of triggering Terry's Counter Attack and interrupting it with the following hit while still relatively high in the air. Terry's lvl2 Power Geyser (QCB, HCF + P) has considerable startup time and often misses even if performed as a Reversal, so it's important that Athena be as high in the air as possible when she trades hits with the Counter Attack. The next segment was inspired by an old Terry corner combo video clip, created by Japanese player Mole for his website MOG only a couple of months after CvS2's official release date. In it, he follows up C-Groove Terry's lvl1 Power Geyser with a lvl2 Power Geyser, canceling into the HK Power Dunk (DP + K) just as the second explosion occurs. Since lvl2 Power Geyser only has a juggle potential of one, the lvl2 cancel is necessary for the second blast to connect. The downward hit of the Power Dunk connects due to its own juggle potential of one and everything seems to work out perfectly. It's quite possibly the most elegant use of C-Groove lvl2 canceling as it was designed and intended to function. Simply replacing the lvl1 Power Geyser with Terry's Counter Attack and adding a Reversal generates the variation shown.
Mai vs Rolento combo
In yet another example of T7's CC mode projectile trick, Mai's fan is used to fill the gap between her lvl1 HK Deadly Ninja Bees (HCF + K) and her Super Deadly Ninja Bees (QCB, HCF + K). Interrupting an A-Groove Custom Combo always eliminates half of the user's remaining meter. Since Rolento's knife connects so soon after Mai's CC Activation, the Deadly Ninja Bees attack alone is enough to supply the necessary meter for her lvl1 Super Deadly Ninja Bees. Using Mai's lvl1 Crimson Firebird Diver (QCB, QCB + P in air) instead yields a three-hit combo due to the move's more minimal juggle potential of two.
Cammy vs Iori combo
Despite the large number of hits, this combo isn't nearly as impressive as the Mai one. It only made the cut because the setup is an interesting modification of the Guile vs Guile setup shown in the CvS2 Guile Exhibition (Revised) video. Evidently, that setup neither works in CvS as proposed nor in CvS2 even with the use of CC mode to reduce the Sonic Boom hit stun. Although Cammy is best equipped for facilitating this variation, she is not very well suited to take full advantage of it. It is possible to combo after the Iori fireball interrupt with a number of Cammy's normal attacks. Unfortunately, she has no Reversal followups more potent than her lvl3 Reverse Shaft Breaker (QCB, QCB + K).
Sagat vs Kim combo
Kim's HK Flying Kick (QCF + K in air) is used to interrupt Sagat's MP Tiger Uppercut, launching Kim to the top of the screen and giving Sagat plenty of time to follow through. With the lvl2 Tiger Raid juggling Kim so high into the air, Sagat is able to cancel into his MK Tiger Knee and recover in time to follow up with another lvl1 Tiger Raid. It may be possible to use the HK Tiger Knee instead, but that version not only takes longer to descend, it also hits Kim earlier on the way up.
Yamazaki vs Geese combo
Probably the most straightforward combo in the entire video, the only advanced thing here is that Yamazaki is backed into a corner and trades hits with a projectile attack, so neither characters gets pushed back from Geese's half of the setup. Yamazaki has just enough time to follow up the trade with a Reversal lvl2 Guillotine (QCF, QCF + P), which connects because the diving hit of that super has some juggle potential. Of course, this requires Yamazaki to cancel the lvl2 Guillotine into a lvl1 Guillotine midscreen, but that's simply a matter of precise timing.
Rugal vs Rolento combo
Generally speaking, multi-hit fireballs in CvS2 are built with the first hit starting at zero juggle potential and each successive hit having one greater juggle potential than its predecessor. For example, the second and third hits of Rugal's fully charged Kaiser Wave have juggle potentials of one and two, respectively. However, they are hidden behind the first hit which has none. Projectile attrition only takes place upon collision with another projectile, blocked or connected impact with the opponent, and the related cases of Parry and Just Defend. In this combo, Rolento's Parries negate the first two hits of Rugal's fireball and manage to hold it in place until Rugal recovers from the Steel Rain interrupt. Since Rolento isn't airborne when the lvl1 Gigantic Pressure (QCF, HCB + P) connects, he isn't considered knocked down until the second hit occurs. With only the third hit of Rugal's Kaiser Wave remaining, it would juggle even if Rolento was grabbed out of the air, but the following lvl2 Total Annihilation (QCF, QCF + K) would not. In order to reach the opponent with both hits of Rugal's HK Genocide Cutter, the motions for both the lvl2 Total Annihilation and the HK Genocide Cutter must be timed so that Rugal nudges forward slightly at each opportunity. Finally, notice Rolento's blank combo meter, followed by a Reversal message. Apparently, if the screen gets overloaded with message tags causing the combo meter to be queued into memory, something malfunctions and the counter is nulled. The usual congratulatory message following the combo meter's disappearance is then replaced by a Reversal message.
Athena vs Cammy combo
At the core of this combo there is an instance of the lvl2 cancel extended juggle glitch. Cammy's lvl1 Reverse Shaft Breaker is used to interrupt Athena's HK New Psycho Reflector (HCB + K) because it draws in the opponent instead of pushing back. The stationary projectile created by Athena lingers until all three of its hits connect, in much the same way as Sakura's fireball and Guile's Sonic Hurricane do when interrupted. The fine point to discuss here is that the lvl2 cancel extended juggle glitch initiation doesn't occur until Athena actually connects with her lvl2 Crystal Shoot (QCB + P), with the lvl2 Shining Crystal Bit (HCB, HCB + P) having no juggle potential of its own. Any qualifying cancel she performs from that point forward before entering neutral state creates a free juggle opportunity and resets the juggle count. Thus, the cancel from lvl1 Shining Crystal Bit to lvl1 Crystal Shoot creates an opportunity for the second hit of the lvl1 Shining Crystal Bit to connect, while the inherent juggle potential of the lvl1 Crystal Shoot takes care of the rest. If the opponent hadn't been knocked down prior to the lvl2 Shining Crystal Bit, canceling directly into the lvl1 Shining Crystal Bit would cause it to hit a second time. However, since the lvl1 Shining Crystal Bit has zero juggle potential, it would not connect until it was canceled into the lvl1 Crystal Shoot. Alternatively, the lvl2 Shining Crystal Bit could be made to hit once and the lvl1 Shining Crystal Bit made to hit twice. Either way, the maximum number of Shining Crystal Bit hits between the two of them is three. Note that canceling from a successful lvl2 Shining Crystal Bit into the lvl2 Crystal Shoot is still not considered a proper lvl2 cancel. Therefore, the most potent combo available from a connected lvl2 Crystal Shoot is simply the combo illustrated in the video with one leading lvl2 Crystal Shoot hit substituted in place of the three from Athena's New Psycho Reflector.
Chun Li vs Rolento combo
Nothing particularly bizarre goes on here. Rolento's Taunt grenade simply interrupts Chun Li's HK throw, freeing her to follow up with a lvl2 Kikoushou (QCF, QCF + P). She cancels that into whiffed HK Hyakuretsukyaku (tap K rapidly) and the resulting juggle opportunity sets up the s.HK knee, which she superjump cancels into her j.HK double kick. It's interesting that Chun Li is able to combo after the first hit of her HK throw, since most throw hits put the opponent into a state invulnerable to nearly all attacks, even those with sufficiently high juggle potential to otherwise connect. The second hit of the throw seems to have this limiter effect lacking in the first. Perhaps Capcom wanted to show off the versatility of the CvS2 combo engine by building a throw containing a natural juggle.
Raiden vs Rolento combo
The sole aim of this setup is to perform two Reversals in one combo. Pretty much the only sufficient method available in CvS2 requires the interruption of Rolento's Taunt grenade so that he may throw a second one before the first goes off. This technique was introduced by Sai-Rec as a way to intercept two successive s.HP attacks by Haohmaru, allowing for a third. The variant shown in this clip is the next step in the evolution of that setup, offering several advantages over its predecessor. By utilizing a dummy grenade to fulfill the cancelability requirements of an ensuing Custom Combo mode Taunt, Rolento gains the ability to release two reduced hit stun CC mode grenades and retains complete control over the timing of the second Taunt. Any method requiring Rolento to get hit as the sole transition between two Taunts ensures that only one of the two can be performed during Custom Combo mode and creates a hit stun recovery gap between the first and second grenades. With the improved setup in place, S-Groove Raiden emerges as the best candidate to fully take advantage due to the extreme hit stun and minimal pushback caused by his lvl1 Crazy Train (QCF, QCF + P) coupled with the useful juggle potential of his lvl3 Flame Breath (HCB, HCB + P). Positioning Raiden in the corner effectively eliminates pushback from the entire opening sequence of the combo and everything works out perfectly from there.
Ryu vs Guile combo
Relying on the same essential principle of multi-hit projectile attrition demonstrated in the Rugal combo, this setup uses Guile's LP Sonic Boom to negate the first phase of Ryu's lvl3 Shinkuu Hadouken. Guile's F+LK knee bazooka trades hits with Ryu's LP Shoryuken and maxes out Ryu's K-Groove meter, enabling him to catch Guile with the four remaining hits of his super fireball. Incidentally, this combo is easier to perform with someone like Terry on the receiving end due to the fact that Guile's LP Sonic Boom dissipates and Terry's LP Power Wave does not.
Rolento vs Zangief combo
The discovery of the above Rolento CC double grenade setup led to the creation of this combo. With Zangief's interruption of his Taunt, Rolento executes a Reversal Custom Combo Activation and starts off the CC with a second Taunt. Once the first grenade hits Zangief, the second Taunt becomes immediately cancelable. As soon as Rolento releases the grenade, he cancels into his close s.HP attack to fill the gap between the first and second grenades. He cancels the close s.HP into a third Taunt, which becomes cancelable as soon as the second grenade connects. Once the third grenade is released, Rolento cancels into the c.HP followed by the s.HK in order to fill the gap between the second and third explosions. This gap is longer than the first because the CC mode grenade inflicts shorter hit stun than the standard grenade. At this point, Rolento is far out of Taunt grenade range so he cancels into his HP Mekong Delta Air Raid (QCB + P -> P) to continue with a fancy yet generic Custom Combo finisher. Subtle execution difficulties arise at several key points throughout the combo. If the Mekong Delta Air Raid inputs are not completed before the third grenade explodes, Rolento may accidentally cancel into some normal HP attack instead of the desired jumping followup attack. Another challenge lies in conforming to the arbitrary precision required to perform Rolento's Patriot Circles (QCF + P -> QCF + P -> QCF + P) while Custom Combo mode is active. Note that the third grenade will only reach the largest of opponents.
CvS EX Ryo vs Iori combo
Unlike CvS2, Reversals in CvS are signified by a momentary white flash over the respective character's sprite. It can be a little difficult to notice, especially in the midst of multiple superfreezes. The original goal for this combo is obvious - EX Ryo's lvl3 Heaven Glaze Punch (QCF, QCF + P) was to knock Iori back into the other hit of the lvl1 Haohshokohken (F, HCF + P). Unfortunately, the long hit stun caused by all CvS fireballs, together with the high velocity of EX Ryo's super fireball, produce a scenario just short of that goal. An alternate setup involving the use of Kim's lvl1 Phoenix Flattener (QCB, HCF + K) to trade with EX Ryo's lvl1 super fireball at point blank range came closest to incorporating all three hits of the ideal combo. With EX Ryo positioned one character width from the corner, Kim's Phoenix Flattener would push both characters towards the corner before colliding with one hit of the super fireball, thus evading the second. Despite the removal of the problematic laggy fireball interrupt, that setup also failed. Even though the Iori setup is further away from attaining the third hit than the Kim setup, it is the more visually impressive one and the bottom line is that neither actually worked. Therefore, the Iori setup shown made the final cut. By the time Iori's lvl3 Maiden Masher (QCF, HCB + P) invincibility expires, only his feet are touching the super fireball. Taking a hit immediately puts Iori into standing reel animation and the second hit of the super fireball has nothing to hit anymore. By that point, EX Ryo recovers and tacks on the Reversal lvl3 Heaven Glaze Punch. Interestingly enough, traces of Iori's flame are visible on EX Ryo's body throughout the superfreeze. Such effects do not stay on in CvS2.
CvS Kyo vs Benimaru combo
Contrary to the previous combo, this one's Reversal is essential. The only way to pick the opponent off the ground in CvS is to follow the third part of Kyo's Wicked Chew (QCF + P) -> Rusting Eight Combos (HCB + P) -> Flashing Slash (P) chain with a Reversal super after somehow interrupting Kyo's punch. Without access to anything as convenient as Rolento's Steel Rain, the only way to accomplish this is for Kyo's HP Flashing Slash to trade hits with an advancing attack. The original plan called for Iori's lvl1 Maiden Masher, but luckily Iori was used in the previous combo. Benimaru took his place and the lightning effect on Kyo's lvl3 Serpent Wave was born. Once the trade occurs, any version of Kyo's Final Showdown (QCF, QCF + P) works as a followup, but only the lvl3 version of his Serpent Wave (QCB, HCF + P) hits at ground level. Since the lvl1 Final Showdown has a juggle potential of five, every extra juggle hit inflicted by the lvl3 Serpent Wave reduces the number of times the lvl1 Final Showdown will connect. Therefore, the minimum number of four lvl3 Serpent Wave hits is chosen, leaving the last two for the followup. Of course, all hits of the lvl3 Serpent Wave could have been used, followed by another off the ground HP Flashing Slash, but the fact that Kyo's Final Showdown loses all juggle potential in CvS2 made it the more interesting choice for a CvS combo. As with the other CvS and CvSPro combos involving projectiles, all conditions for the mysterious random game slowdown during projectile hit stun have been met. Slowdown can be seen with the last three hits of Kyo's lvl3 Serpent Wave and the first hit of his lvl1 Final Showdown.
CvSPro Ken vs Dhalsim combo
When CvSPro was first released and everyone noticed that multi-hit uppercuts gained juggle properties, the prevailing theory was that they worked based on phase juggle potentials in a manner nearly identical to multi-hit projectiles. CvS2 adopted what looked to be the same system and that remained the popular opinion until Sai-Rec proved that they in fact work based on time limited free juggle states. This combo simply exists to demonstrate that Sai-Rec's findings reach back to CvSPro. Due to its long invincibility period, Ken's CvSPro HP Shoryuken can not be interrupted until it has completed the first two hit animations. An advancing super such as Kim's lvl2 Phoenix Flattener can be used to trade with the uppercut's third hit, but that one produces no free juggle state. Therefore, a basic projectile interrupt combo was created using Dhalsim's versatility as a combo dummy in order to showcase this feature. Notice that the game slowdown in this clip allows the capture card to get every frame of background lens flare animation that CvS normally scrolls through at a very rapid pace.
CvSPro EX Cammy vs Vice combo
Neither CvS nor CvS2 allocate any juggle potential to the first phase of Cammy's Spin Drive Smasher. Therefore, this combo is only possible in CvSPro. Cammy's HK Cannon Spike (DP + K) trades hits with Vice's s.LP attack, landing Cammy in the perfect spot to continue with her lvl1 Spin Drive Smasher. Although Cammy's lvl2 Reverse Shaft Breaker has plenty of juggle potential, it seems to progress through those values gradually. It's certainly possible to get both parts of the lvl1 Spin Drive Smasher to hit twice each. However, if either does so, the lvl2 Reverse Shaft Breaker will whiff completely. Also, the second phase of the lvl1 Spin Drive Smasher must miss its last hit so that Cammy doesn't bounce off into a lengthy recovery animation. Note that Cammy's Reversal is marked by a blue flash similar to Ken's, yet she is not rewarded with the same on-screen message. CvSPro programmers probably forgot to take into account all Reversal possibilities.
Evil Ryu vs Rolento combo
Oddly enough, it seems that the amount of super meter gained by K-Groove when taking hits is affected by the vitality level of the character in question. For example, the same introductory sequence with Evil Ryu at full life would not refill his super meter to capacity. Thus, the clip starts with Evil Ryu at less than maximum vitality. The only tricky part to performing this combo was timing everything to capture the lightning strike at the end. Although it was no easy task, it was simply a matter of trial and error. The Reversal Taunt mid-combo is really the only technically worthwhile component, since the lvl3 Metsu Hadouken (QCB, QCB + K) and the lvl3 Shungokusatsu (LP, LP, F, LK, HP) can easily be linked together in N-Groove through the use of Dan's Chohatsu Densetsu (QCF, QCF + Start). Obviously, the character ratio disparity is necessary for the combo to finish off Rolento.
|